A few lucky pilots can afford to buy the latest sailplanes, but most of us are limited to used ones. The price of used gliders varies widely. The Libelle is available for around $15,000, while for a little over $20,000 you can purchase a ship such as a Mosquito, PIK-20, Mini-Nimbus, or LS-3. For $25,000 to $35,000 you can move up to an ASW-20, LS-4, or DG-300. For around $40,000 you may be able to find a ship such as a Discus or LS-6.
The low $20,000 price range may contain the best buys. Gliders in this range look like any of the current models, have similar performance, and have attached canopies (a significant selling point). This article will discuss one $20,000 glider — the LS-3. This glider shares its fuselage with the LS-4, but has the bonus of flaps and automatic control hookups. Best of all, it costs less than the LS-4.
Anyone interested in the LS-3 should first read the three Dick Johnson flight tests on the SSA website. Johnson tested the original -3 model as well as the slightly newer -3a model. The principal difference between the models is that the -3a has split flaps and ailerons rather than the one piece flaperons of the -3. According to Johnson, the -3a also has a 4″ higher tail (which carried over to the -4), and a horizontal stabilizer with a 4” greater span. I owned two LS-3s, serial number 3255 (1977 model) and serial number 3320 (1978 model). Both were the original model with flaperons. I flew them for a total of 250 hours.
Flying the LS-3
The -3 is an easy glider to fly. When I first flew the -3, I had total glider time (including instruction) of only about 30 hours (mostly in a Blanik L-13). Aside from over-controlling in pitch on my first flight, and initially making several heavy landings (the -3 has robust landing gear), I had no problems flying the glider. I sold it for a newer glider (an ASW-24B) because I thought I needed a shinier and fancier glider. I discovered, however, that except for the absence of a lot of nice, but minor, features (such as light wings, a wheel brake that works, a built-in box for the batteries, cool looking winglets, and an eyeball vent in the sidewall), the -3 was the equivalent of the -24. It flew about the same as the -24, and had much better spoilers.
How is the performance of the -3? Quite good. My second glider had been refinished, and had no discernable bump or hollow at the spar. Based upon very unscientific informal tests in calm air, its glide ratio appeared to be around 40:1, and perhaps better.
The -3 has a couple of peculiarities. One is that you don’t want to use full negative flaps at the beginning of the takeoff roll, because that setting lacks full aileron movement. Another is that you can’t go to negative flaps on landing, because full open spoilers force the flaps to the full positive setting. This also means you have to be careful about opening the spoilers when you are above the redline for positive flaps.
Landing the -3 is very easy, as it has giant spoilers. Even when approaching at a higher speed in gusty conditions, the big spoilers will get you solidly on the ground immediately – no floating down the runway in this glider. If you approach slowly and use full spoilers on your flare, you may have a hard landing.
Automatic Control Hookups
A nice feature of the -3 is its automatic control hookups. Most of the current gliders truly are automatic – push in the wings and the controls are connected. The -3 is automatic in the sense that you cannot insert the wingpins unless the controls are hooked up. So you cannot launch with disconnected controls. To get the wings on the glider, however, you must manually line up two fittings (spoilers and flaperons) at each wing root. This means the -3 is as safe as the newer gliders, but assembly does take a bit more work. The -3a model is less safe, because it went to separate flaps and spoilers, and has the old manual connection on the ailerons.
The Landing Gear System
The LS-3 (and also the LS-4) have a unique landing gear handle which is a foot-long hinged lever on the left side of the cockpit. Flip it forward for gear up; flip it back for gear down. This arrangement has both its good points and its bad points. The good point is that when the handle is forward (gear retracted), the end of the handle blocks the pilot from opening the spoilers. This is good assurance against making a gear up landing. One bad point is that your left knee may rest against the end of the handle. Not terribly uncomfortable, but not optimum. Another bad point is that the end of the gear handle is close to the left seatbelt when the gear is down. When buckling up, there is the possibility of fastening the seatbelt around the gear lever, or retracting the lever part way.
Some -3 and -4 pilots have reported gear collapses on landing. This problem is due to the gas strut that holds the over-center mechanism in place. If the strut is weak (or the gear mechanism is dirty and not lubricated), the gear may not lock down, or may become unlocked in a rough landing. A wealth of information about this problem can be found by a search of the rec.aviation.soaring archives, as well as by a search of the Yahoo LS group archives.
A related problem can occur when lowering the gear while assembling the glider. If the cradle is not high enough, the tire will hit the ground before it is fully extended, and the over-center mechanism will not lock. The gear handle will go down all the way, however, so the gear will appear to be down and locked. When the ship is pushed out of the cradle, the gear will collapse.
One characteristic of the -3 that is common in gliders of this vintage is an ineffectual Tost drum brake. A possible fix is to send the brake to Vintage Brake in Sonoma, California (www.vintagebrake.com). I did this, but the Tost brake had such a poor design that Vintage could not do much to improve brake performance. Others have reported better luck.
A peculiarity of the brake on all LS gliders is that you activate it by pushing both your heels forward. I never had much luck doing this and using the rudder at the same time.
Heavy Wings
Perhaps the biggest weakness of the -3 is its heavy wings. It has one-piece flaperons that are driven from the root end (there is no aileron drive in the wing). To prevent flutter, each flaperon contains around 20 pounds of lead. This causes each wing to weigh 170 to 175 pounds. For comparison, wings on recent Ventus and ASW models weigh less than 130 pounds each. The wings on the -3a are somewhat lighter than on the -3, because the separate flaps and ailerons eliminate the need for the lead weights.
A 175 pound wing is close to the maximum that most people would want to handle without a one-person wing dolly. However, it can be done – I never used a wing dolly, and people did not disappear when I was rigging. Many -3s have a Komet clamshell trailer that works well with the -3 wing. After the wing is pulled out of the trailer, the tip is walked out while the wing root pivots on the dolly in the trailer. Once the tip is in approximately the right position, the person on the root need only lift the wing off the dolly, walk a couple steps, and insert the wing into the fuselage. Just reverse the process when derigging.
Ventilation
Like other gliders of its vintage (and even some current gliders), the ventilation in the LS-3 consists of a small (and mostly ineffective) vent at the front of the glare shield, and a flip-out vent in the canopy. The canopy vent is very noisy and, while it admits a lot of air, the air is directed at the pilot’s chest. I installed an eyeball vent in the instrument panel. Not only does the air go where it is needed, but you can close the noisy vent in the canopy. Installing the eyeball vent was straightforward – we used a short piece of ducting between the instrument panel and the aluminum plate in front of the pedals.
For any ventilation system to be effective, there must be a way to exhaust air from the cockpit to the tail boom, and then from the tailboom out around the base of the rudder. As well as I could tell, my first -3 had no way to exhaust air from the cockpit to the tailboom until a previous owner punched several holes in the luggage compartment cover. My second -3 had several holes molded into the luggage compartment cover, though it is unclear whether they are intended for ventilation or something else. There is a large opening at the end of the fuselage around the base of the rudder. This opening is filled with the spar for the tail. However, air is able to exit the fuselage through a 2″ hole in the middle of this spar.
Other Irritations
The horizontal tail is attached to the top of the vertical by a bolt that takes a lot of turns to tighten or loosen. A safety wire prevents the bolt from unscrewing in flight. To remove the horizontal you have to push the safety wire to the side with one finger while you use the other hand to turn the bolt. As the bolt unscrews, available space for the finger holding the safety wire gets smaller and smaller. Large fingers can get squished. An awkward arrangement. The -3a has a ratchet arrangement that eliminates the wire.
With safety in mind, newer gliders have their seat belt anchors placed well forward. This helps to keep the belt positioned low across the pilot’s pelvis, rather than riding up across the abdomen, particularly when the shoulder straps are tightened. The -3 has its seatbelt anchors further aft than is optimal, and one must be careful to snugly tighten the lap belt prior to the shoulder straps. For some reason, the shoulder belts are some -3s are not mounted to the bulkhead behind the pilot, but to the bar that the seatback rests against. Hopefully, this arrangement would be strong enough in a crash.
The bottom of the seatback may be bolted to three different locations on the bottom of the seat pan – too far aft, really too far aft, and absurdly far aft. Even in the forward position, you will need some support for your lower back.
The early -3s came without a detent to hold the flap handle. Instead, springs in the control system held the handle at either full negative or full positive flap. If you wanted a flap position somewhere in between, you held the handle with your hand. What were the designers thinking? Fortunately, most -3s now have some sort of aftermarket detent system.
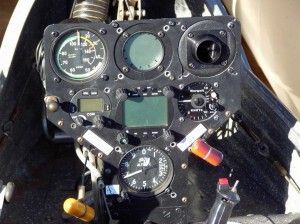
The LS-3 came with an instrument panel with a lot of holes, and presumably the LS designers understood that some of those holes might be filled with electric instruments. Yet, both of my -3s appeared to have come from the factory with no way to mount a battery. Again, what were the designers thinking? When I bought it, my second -3 had a makeshift battery mounting arrangement that would have been downright dangerous in severe turbulence.
Conclusion
Most of this article has described problems with the LS-3. However, these problems are minor, and many are shared with other gliders of the vintage. Newer gliders avoid most of the problems, but they don’t sell for $20,000. On a “bang for the buck” scale, gliders like the -3 are a great buy.

11 comments for “Used Sailplane Review: LS-3”