- Day 23 – Completing the SeeYou Culture Map
- Day 10
- Day 2
- Day 3
- Day 4
- Day 5
- Day 6
- Day 7
- Day 8
- Day 9
- Day 11 – Green everywhere!
- Day 22 – Correcting map problems
- Day 13 – Eureka! A SeeYou map for Caesar Creek
- Day 14 – Getting trees in the right places
- Day 15 – Finishing up the Forest
- Day 16 – Two trees forward, one forest backward :-(
- Day 17 – Regula Rides to the Rescue!
- Day 18 – I’ll take 110 servings of 2 pixels to the left, please
- Day 19 – Roadblocks, Triumphs and Disasters, oh my!
- Day 20 – More Airports
- Day 21 – Adding Rivers, Roads, and Towns
- Day 1
At the end of Day 16 I was bummed out because, although I though I had done everything exactly right and had even managed (with Dave Regula’s help) to get past a major roadblock, the forest areas in my Caesar Creek scenery still didn’t line up with my Terragen-generated forest background surface colors, as shown in the following image copied from Day 16.
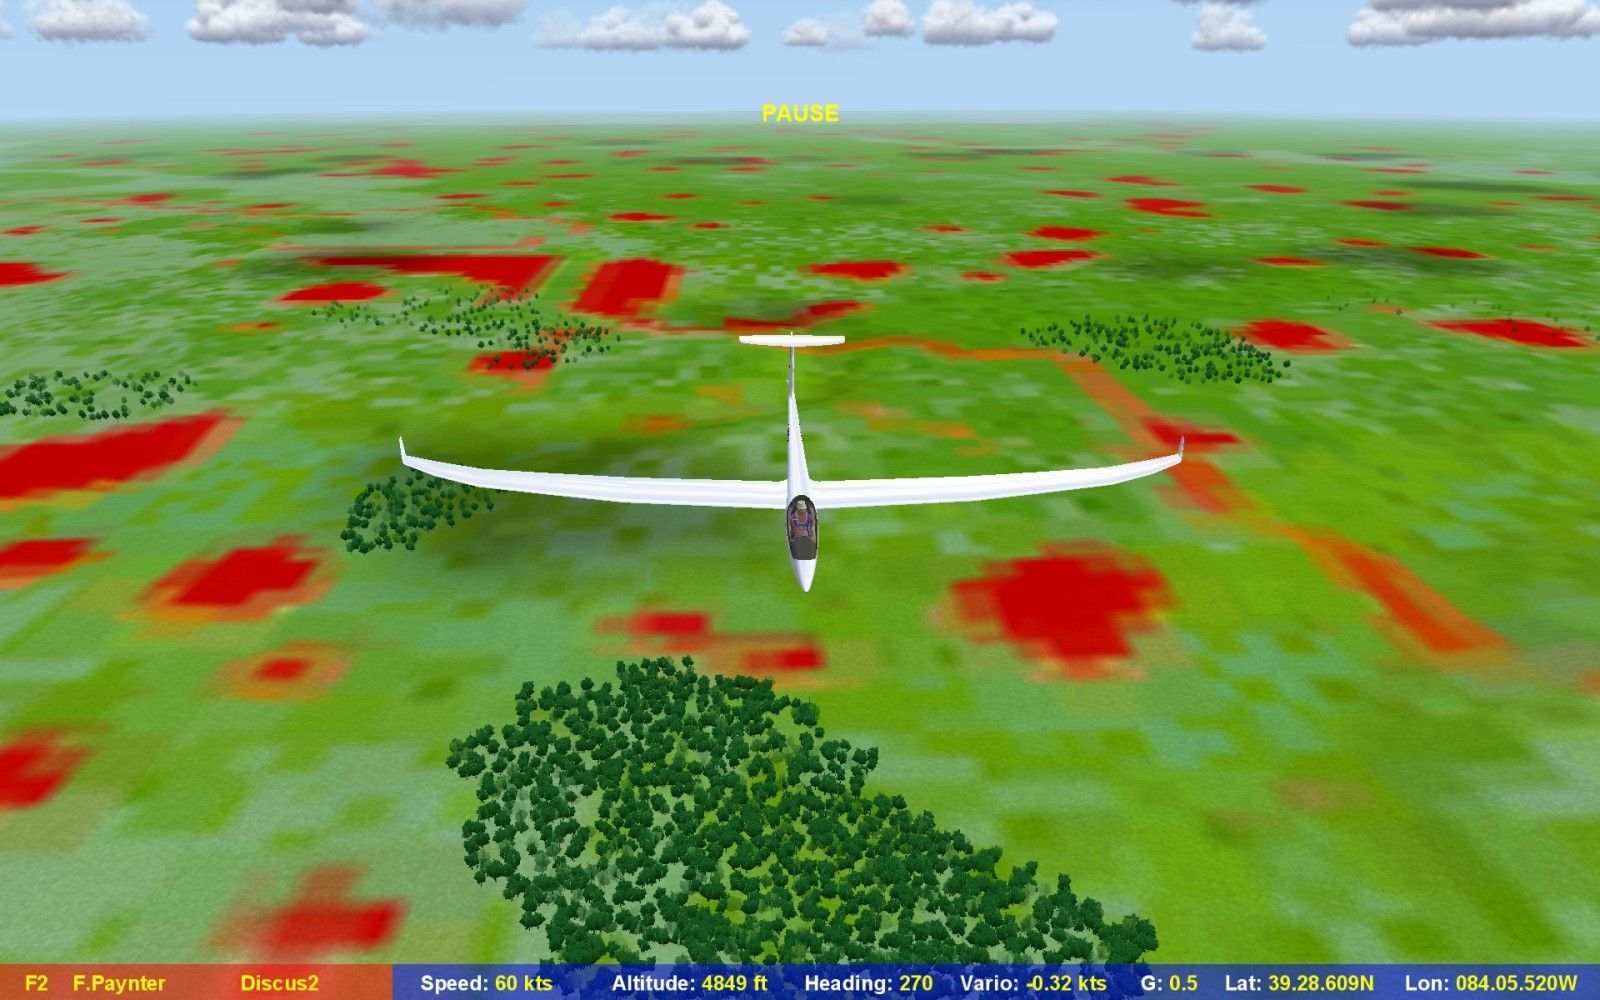
Screenshot in Condor showing red triangular forest area in background. Note that actual treed areas still don’t match up with red splotches.
Now, I am acutely aware that my chances of achieving ‘rock-star’ status as a Condor scenery designer are right ‘up’ there with my chances of beating Sebastian Kawa at a WGC (or even getting to a WGC as other than a spectator), but I always thought that I had a good chance of actually producing a decent, albeit uninteresting, Condor scenery!
After crying in my beer for a while, I did what I have been doing all along to get out of whatever crack/hole I’ve gotten myself into – I threw myself on the mercy of Dave Regula (aka TiltRider)’ and begged once again for help. He suggested that since my Terragen-generated forest background color areas (aka red splotches) now more or less matched the light green Landscape Editor forest areas, it was probable that all I needed to do now was re-export the forest map from Landscape Editor using ‘File->Export forest map’. Hmm, I was sure I had done that already, multiple times even, but one more time couldn’t hurt – and Lo and Behold, it worked!!
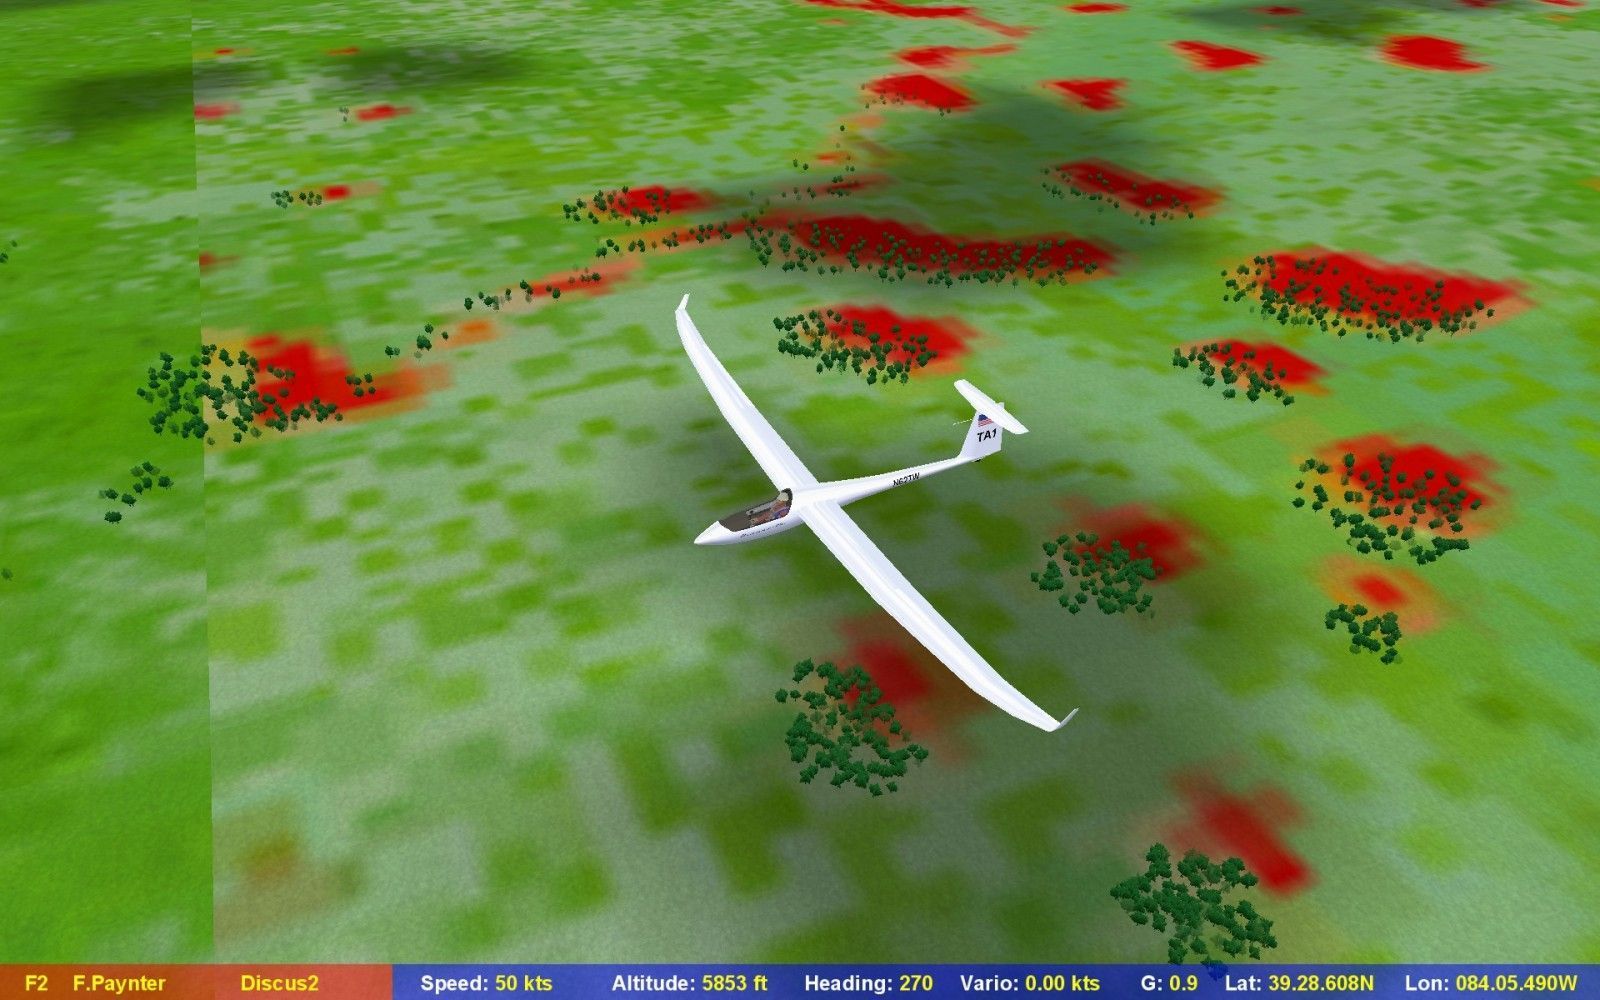
Caesar Creek scenery showing trees matching with red splotches
As shown in the above pictures, the treed areas now match up (almost) with the red splotches. David suggested that the cure to that problem was to simply edit the individual Deciduous/Coniferous_Tile_XXYY.bmp images in Photoshop to move the image one (or more, I’m not sure at this point) pixels to the left, filling in on the right with the pixels shoved off the left side from the adjoining tile. So, I launched PS, and edited just tiles 0402, 0302 and 0202 so I could see the effect of the operation. After doing the edits, of course I had to re-render tile 0302 in Terragen, reload textures in LE and re-export to DDS so I could see the following result in Condor.
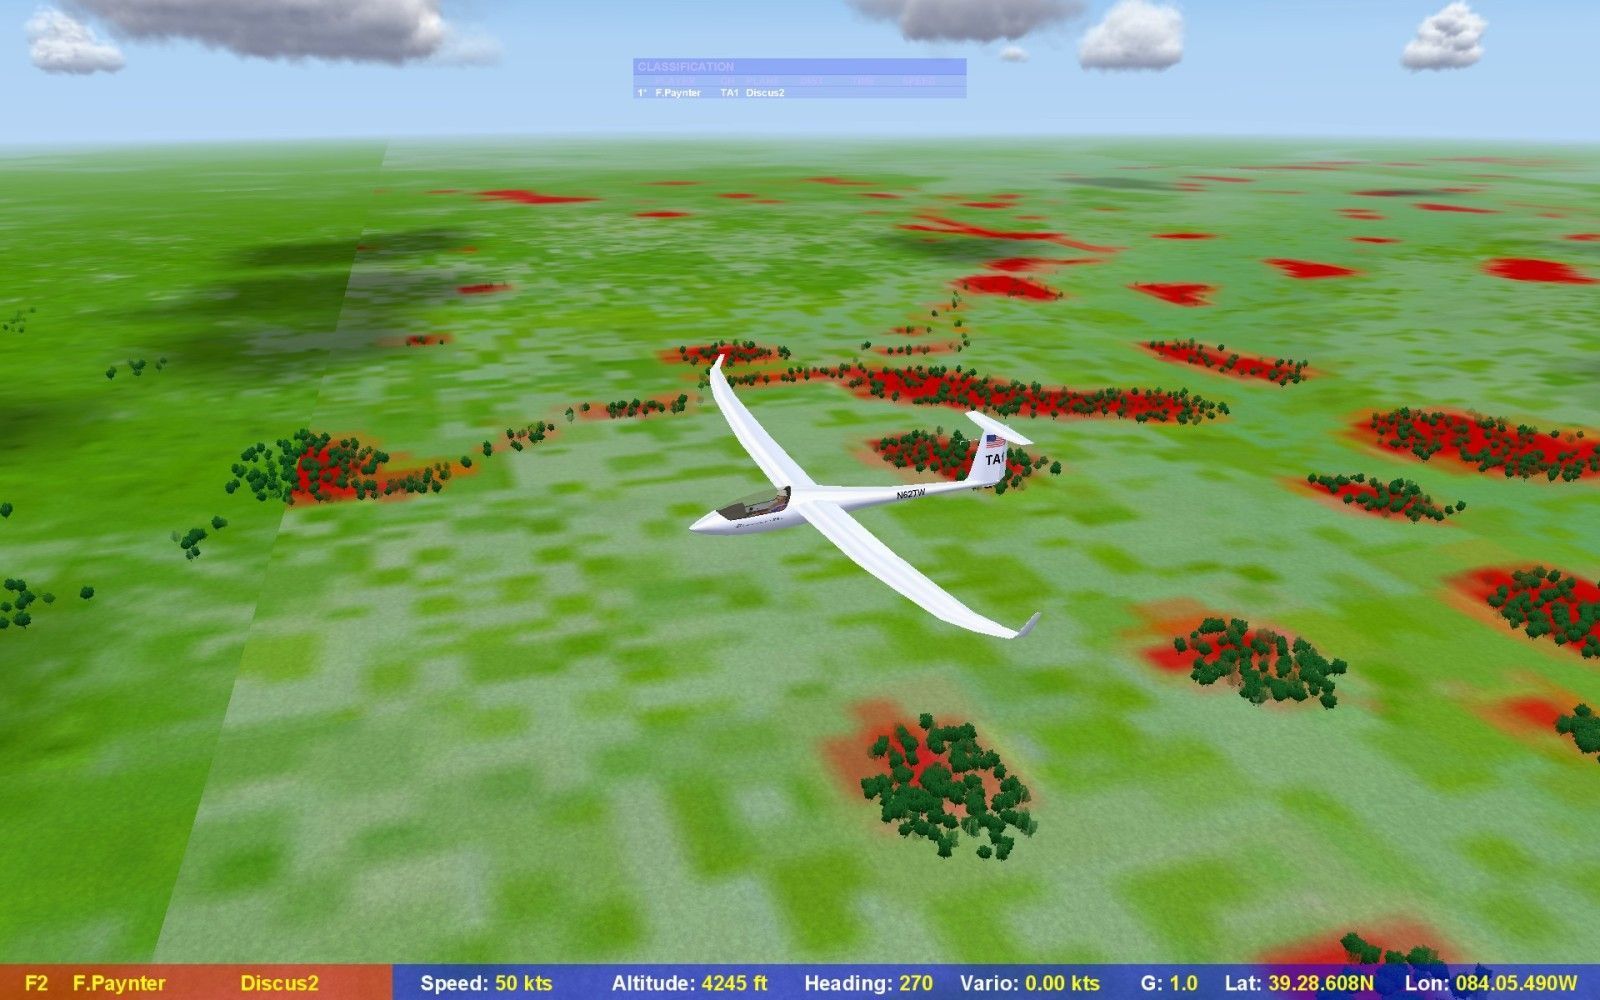
Testing the Caesar Creek scenery after 2-pixel left adjustment of DeciduousTile_0302.bmp
Now the forest background mask lines up much better with the treed areas in tile 0302. So, all I have to do now to get the forest background color into my scenery is to do the same treatment for the other 109 tiles (well, and change the treatment color from RED to a more forest-like green). In Dave’s last rescue email he mentioned that Hitzi’s TerragenForCondor utility might handle this for me more or less automatically, so that’s my next step.
As an aside to all of this, I have to say that I am now a born-again Photoshop convert. I was dragged kicking and screaming into Photoshop by this project, but I’ve now seen the light. At least so far, I have found PS incredibly easy to use and extremely powerful; this last little project involving the 2-pixel shift was dead-simple, once you get the hang of using layers and then ‘flattening’ the image afterwards.
For my next post, I’ll go through the process of shifting all 110 DeciduousTile_XXYY.bmp masks 2 pixels to the left, and (hopefully) using TerragenForCondor to render all 110 tiles with forest-colored backgrounds for forest areas.
Thanks again to Dave Regula for ‘riding to the rescue’! ;-).
TA


2 comments for “Day 17 – Regula Rides to the Rescue!”