- Day 23 – Completing the SeeYou Culture Map
- Day 10
- Day 2
- Day 3
- Day 4
- Day 5
- Day 6
- Day 7
- Day 8
- Day 9
- Day 11 – Green everywhere!
- Day 22 – Correcting map problems
- Day 13 – Eureka! A SeeYou map for Caesar Creek
- Day 14 – Getting trees in the right places
- Day 15 – Finishing up the Forest
- Day 16 – Two trees forward, one forest backward :-(
- Day 17 – Regula Rides to the Rescue!
- Day 18 – I’ll take 110 servings of 2 pixels to the left, please
- Day 19 – Roadblocks, Triumphs and Disasters, oh my!
- Day 20 – More Airports
- Day 21 – Adding Rivers, Roads, and Towns
- Day 1
After Day 2 I had gone through file conversion to .TRN files (whatever the heck that is -I think maybe Terragon?). So now I’m off to see the wizard again for the next step (video tutorial #5), which appears to be opening the .TRN files in the Landscape editor.
Following the video tutorial, I launched the Landscape Editor (part of the Condor Scenery Toolkit – SRT), selected File –> Open, then navigated to the ‘setup’ folder in my scenery folder tree (C:\Documents and Settings\Frank\My Documents\Soaring\Condor\Sceneries\CaesarCreek\setup on my PC) where I put the TRN files at the end of Day 2. Inside the ‘setup’ folder I highlighted the single .TRN file and clicked ‘Open’. I got a progress bar that said ‘Loading Textures’, and then I got a mostly gray screen showing the mostly flat CCSC terrain. However, there was enough color variation so I could see some familiar landmarks, so I’m encouraged.
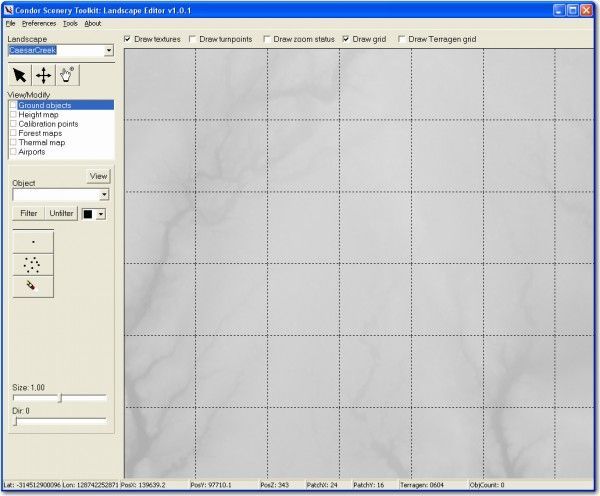
Landscape editor with .TRN file selected
The Landscape Editor tool seems to be pretty complete and useful at first glance. I really like the ‘Missing Files’ tool that pops a dialog showing what files are missing from a complete scenery file system, as shown in the next figure.
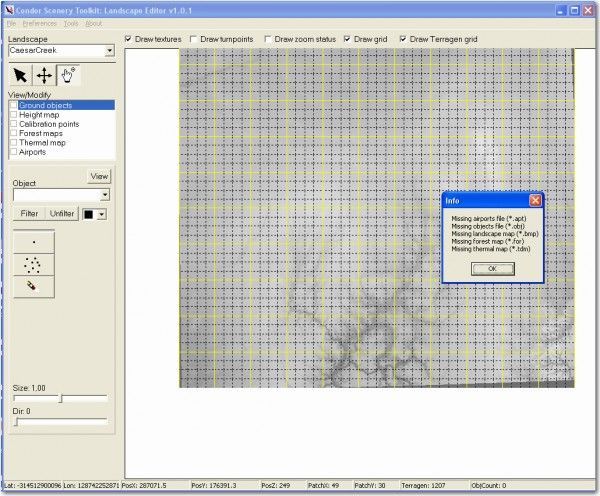
Landscape Editor showing the ‘Missing Files’ dialog
The tutorial goes on to show how to create minimal files of each type, arriving at a point where the scenery can actually be loaded into Condor and flown, albeit without much in the way of interest.
After saving the landscape and the landscape flightplanner map (good paranoia moves IMHO). Saving the forest map took a few minutes. First the system computes the forest map, and then saves it. Both the forest map and the thermal map take about the same amount of time. On my Dell Precision M6300 laptop, the forest map computation took about 2 minutes.
Again following the tutorial, I saved the landscape, and then closed the Landscape Editor. I then navigated to my Condor landscapes folder, and lo and behold – a CaesarCreek landscape folder now exists – yay!
Hmm, interesting that the new scenery folder contains a ‘Working’ subfolder that isn’t present in any of the finished landscape folder trees, and *doesn’t* contain a ‘World’ folder that is present in finished landscape folder trees. I assume all will be revealed in good time. That was pretty much the end of this tutorial – the next one will deal with landscape calibration
OK, video tutorial #6 – Scenery Calibration: The first thing that happened is the video shows an Excel spreadsheet, and said ‘this is available on the scenery forum’. OK, so now I’m off to find this spreadsheet; maybe referenced in the CST HowTo? Opened Scenery Toolkit.pdf (installed into the Condor/Condor Scenery Toolkit/Doc folder). Hmm, no, the CST uses a different procedure here, so I guess the clever Excel spreadsheet was created after this PDF file.
OK, I noodled around a bit in the Sceneries subforum at CondorSoaring.com and found this post (http://forum.condorsoaring.com/viewtopic.php?f=3&t=8141&start=15) written by the guy who generated the calibration spreadsheet. Pretty interesting and informative, especially when it says explicitly that the spreadsheet process replaces Step 3 of the CST ‘HowTo’ – I love explicit instructions! ;-).
The ‘theory’ section of this post examines the .hdr file for the scenery in question, so here is mine again
file_title = CaesarCreek
data_format = int16
map_projection = UTM Zone 16N
ellipsoid = WGS84
left_map_x = 582750
lower_map_y = 4317120
right_map_x = 845550
upper_map_y = 4657590
number_of_rows = 3784
number_of_columns = 2921
elev_m_unit = meters
elev_m_minimum = 109
elev_m_maximum = 469
elev_m_missing_flag = -9999
So now I know that the Caesar Creek scenery is all in one UTM zone (16N), so that’s a good thing. By dint of a bit more noodling, I got to http://www.lurik.fr/CondorScenery/04.2a-Landscape-Calibration-excel-en/04.2a-Landscape-Calibration-excel-en.html, a video tutorial generated (I think) by the same person that created the calibration tool, and part of the demo was where to get the tool itself – at http://www.lurik.fr/CondorScenery/00-Outils/Condor%20Scenery%20Tutorial%20-%20Outils.htm. I noted that the video demo used V2.2, but the current one that I downloaded was 2.8-light. This is actually a very good sign, as it indicates that the tool is still being maintained and enhanced – yay!
I’d like to give some proper attribution to the wizard who did the calibration tool (and to those who did all the other cool tools, too!), but all I know at the moment is that his site is http://www.lurik.fr – so THANKS Lurik! If I can find some better data on this I’ll put it in a later post or the Condor Corner article(s) that I hope to generate from this. Ah, wait a minute -I found a ‘credits’ tab in the Excel file, so here it is:
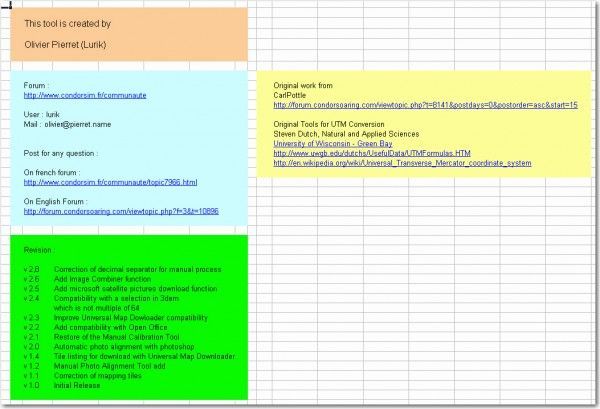
Calibration Tool Credits Sheet
Anyway, I dl’d the calibration tool, and used it to open my CaesarCreek.HDR file created earlier in the process. Right away things go bad, as I see a huge error dialog that says “The selection in 3DEM is not pultiple (multiple?) of 64”. Aw, SNAP – I’m screwed. …
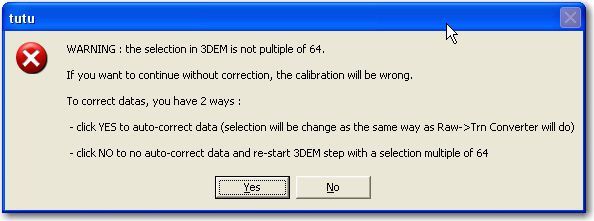
3DEM points not a multiple of 64 – oops
Wait, I’m *not* screwed – Pierret not only has trapped a (probably common) error condition, he describes two ways to fix it – YAY!…, and one of the ways is to simply click the “YES” button to auto-correct the problem — Double YAY! Kudos to Pierret for recognizing a problem, creating an automatic checking algorithm to identify the problem and alert the user, and then for providing an automatic solution for duffers like me.
So, I of course click ‘YES’ – please save me from my own incompetence – and it does! I get a nice message box telling me I was successful – whew! Now to generate the calibration file, I click that button, navigate to my scenery’s ‘Working’ folder, and select the currently empty CalibrationPoints.csv file (nice to have the template already there). Done!

Successful Calibration
Well, maybe not quite – according to to Pierret’s video tutorial, I also need to save the calibration tool spreadsheet with a name that is associated with the scenery. I chose to save it in C:\Documents and Settings\Frank\My Documents\Soaring\Condor\Sceneries\CaesarCreek as 120726 Calibration CaesarCreek.xls
Next in Pierret’s demo, he opens the new scenery in the Landscape editor. While watching Pierret’s demo, I brought up the Scenery Calibration video tutorial, which (I hope) will hopefully show the same thing. It is sort of amazing to me that there are *two* video tutorial (single or series) describing Condor scenery construction. For such a esoteric activity (Condor scenery design), there certainly seems to be a LOT of high-quality information available!
So, I launched the Landscape Editor, and selected my CaesarCreek scenery file from the drop-down list of landscapes. This threw me for a second or two as I tried to ‘open’ the scenery file, but the editor correctly smacked my fingers with a virtual ruler until I figured it out.
After selecting the CaesarCreek scenery, the map showed up on the screen, and I was able to display the calibration points per the video tutorial explanation. However, I noticed immediately that there was something badly wrong with my scenery layout, as the calibration points continued well off the map to the north, as shown below. I have no clue how this happened, or even what I should do about it.

Too many calibration points?