After having achieved semi-nirvana with respect to basic scenery coloration, I have decided to go back and see if I can now understand/execute some more of the steps described in the Condor Scenery Toolkit manual. As I read through the document, I realized I had now pretty much accomplished Tasks 1-5. Task 6 describes the process of adding coniferous and deciduous forest areas to the scenery, and it is broken up into Part A-D, with each part containing several steps. This post describes my (mostly successful I think) attempt to perform Part A – The Basics. For reader convenience, I have copied the verbatim CST text in bold italic and then followed each step with my notes in regular text.
Task 6 – Generating forest areas
Part A – The basics
You will need a graphics application like Adobe’s Photoshop that will support “8bf” file format, copy the 2DHyperClouds.8bf to Photoshop/Plug-Ins/Filters directory and start Photoshop.
Step 1:
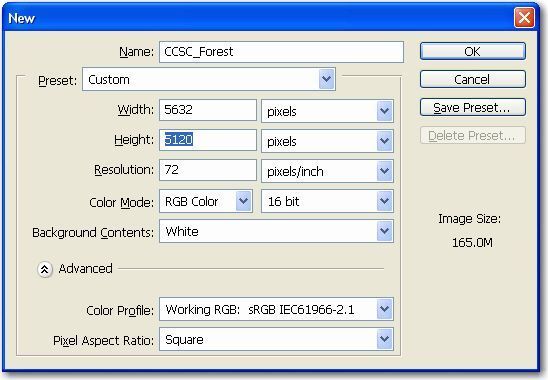
Open Photoshop and create a new empty RGB bitmap (24 bit) with the same dimensions (in pixels) as the size of the terrain. You should have made a note of this when working with task 2, after the file is created make sure that the colour selector on the Tool is set to black.
Of course I made a note of the terrain pixel dimensions (NOT!!). Oh well, easy enough to figure out. I have 11 columns of 10 tiles, each tile a 512×512 pixel square. So, my scenery dimensions are 11×512 = 5632 wide x 10×512 = 5120 high.
I launched Photoshop (yes, I have now been assimilated into the borg) and created a new empty 5632 x 5120 24-bit RGB bitmap. Right away I have a problem, in that my version of PhotoShop apparently only supports up to 16-bit. This is OK with me, as the file size for this monster is 165 MBytes!
Step 2:
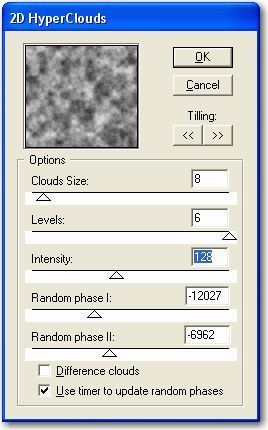
Select Filters->Render->2DHyperClouds and set the cloud size between 5 – 10, set the levels to 6, leave the rest the same.
Rats! I can select Filters -> Render, but the ‘2DHyperClouds’ option is grayed out – wonder what I’m doing wrong this time…. OK, I figured it out. The ‘2DHyperClouds’ filter only works on 8 bit/pixel images (the ‘(24 bit)’ in Step 1 was the entire color depth for all 3 colors – not bits/pixel). Once I changed the image to 8 bit/pixel (also reducing the total image size to a more reasonable 82.5 MByte), then the ‘2DHyperClouds’ filter option became available for selection.
Step 3:
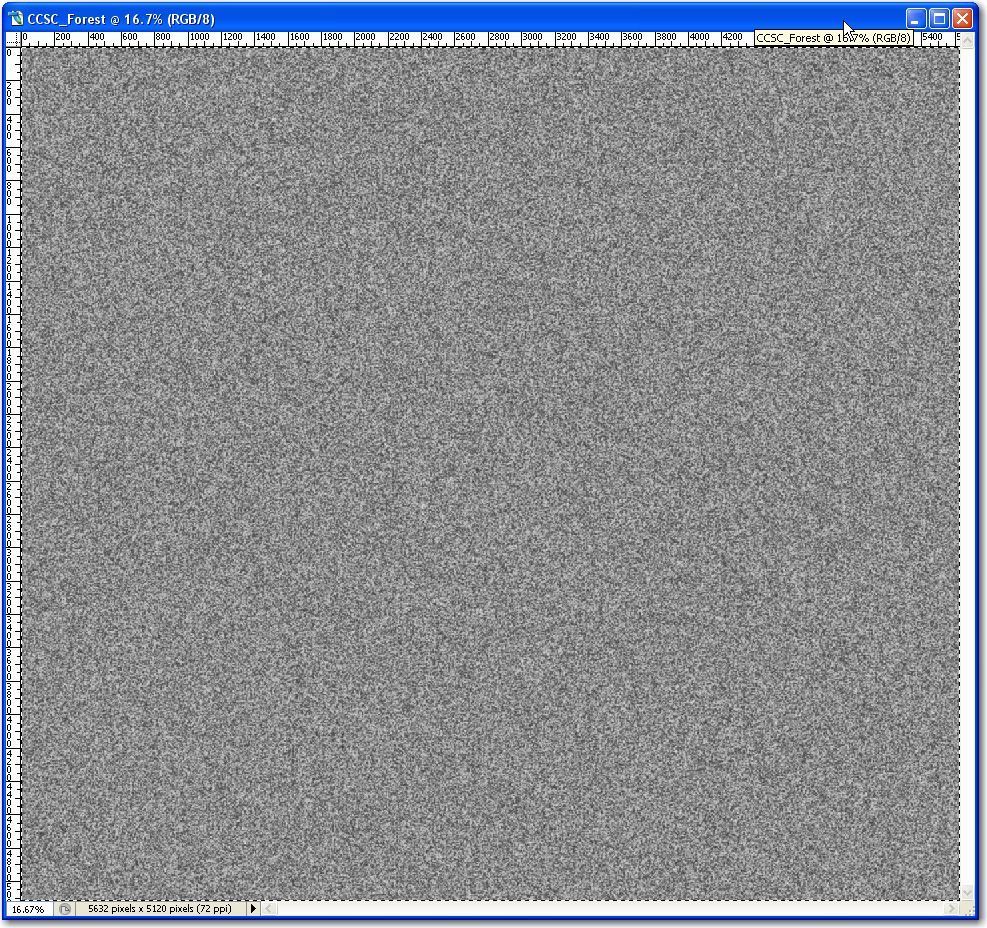
Set the contrast to +100 and move the brightness slider until you reach the desired coverage, white areas are where trees will grow and the black areas where nothing will grow at all.
OK, I have the image set the way I want – not too many trees in Ohio, so mostly black speckled with white dots, as shown
Step 4:
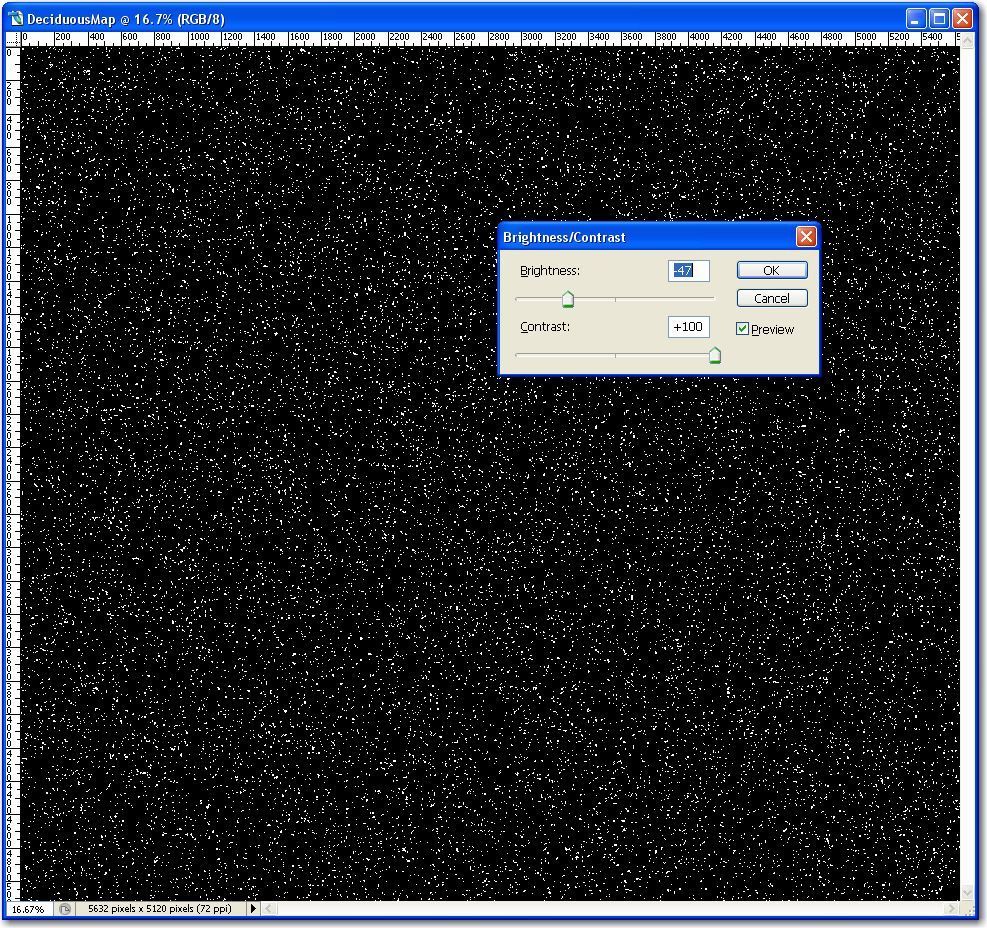
Select Filter->Blur->Gaussian blur to smooth the edges a little, set the contrast again to +100 and move the brightness slider to the level you have set before.
Hmm, couldn’t figure out how to do this exactly as stated. My Gaussian Blur took doesn’t have contrast – just a pixel size for the blurring operation… OK, figured it out. The instruction means to restore the contrast and brightness back to where they were prior to the blurring operation, using the Image -> Adjustments -> Brightness/Contrast tool.
Step 5:
Select Image->Image Resize to Resample the image to 2x the size and apply contrast to +100 again, and move the brightness slider as set before.
Well, this part isn’t obvious at all – I expected something like ‘Resample to 2x’ as a choice, but all I got was the dialog that allows me to set the image size. So, I *think* what needs to be done here is to resize the image to 11,264 x 10240 or 330 MBytes – wow!
Step 6:
Select Image->Mode->Greyscale, then select Image->Mode->Bitmap->50% threshold.
Did this, and now the image size is down to a much more realistic 13.8 MByte
Step 7:
Save this image to /Landscapes/yourlandscape/Working/ForestMaps/ConiferousMap.bmp
See Step 8 below
Step 8:
Repeat the above process and then save the image to /Landscapes/yourlandscape/Working/ForestMaps/DeciduousMap.bmp
OK, I guess this means to go through Step 1 – Step 6 again, but this time adjusting the coverage for Deciduous trees versus coniferous. Hmm, well there aren’t any coniferous trees in Ohio, so I simply renamed the ‘ConiferousMap.bmp’ file to ‘DeciduousMap.bmp’ and partied on.
Step 9:
Backup these BMP images just in case.
Yep – good idea! Saved mine in the same folder as ‘Copy of DeciduousMap.bmp’